Burn subtitles into video
How to burn subtitles into video so they always show, plus open vs closed captions and which to pick for TikTok, Reels, YouTube or a client.

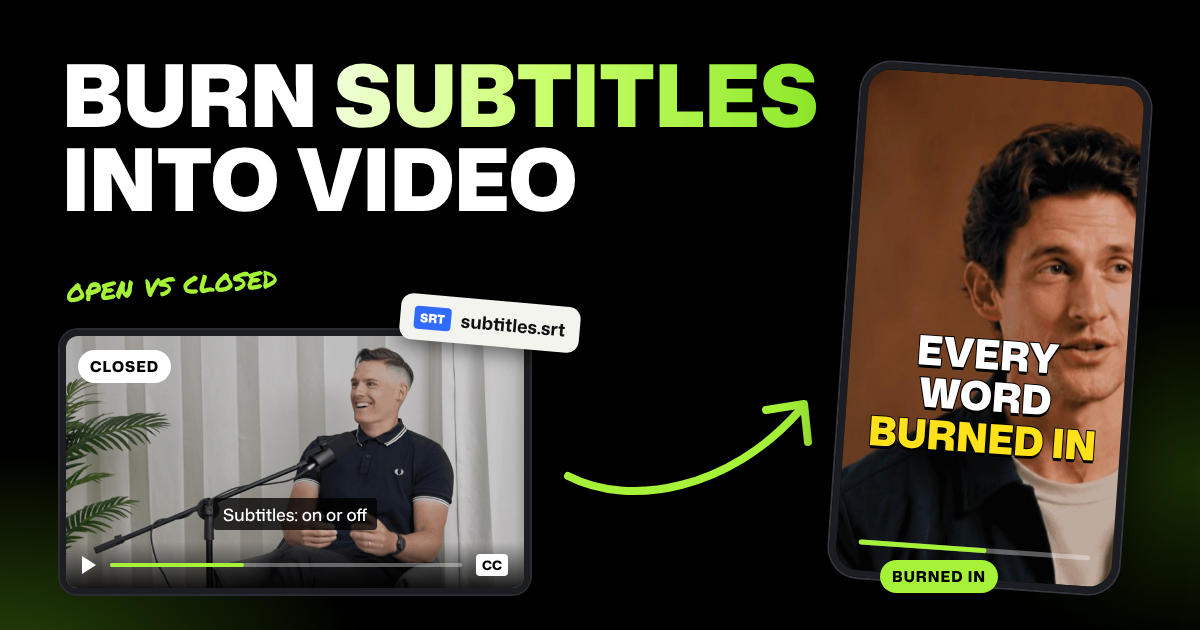
TLDR: To burn subtitles into a video, place the captions on the picture and export it, so the text is part of every frame. These open, or burned-in, captions always show. Closed captions (soft subtitles) live in a separate file, such as an SRT, and viewers can turn them on or off.
A client asked for "burned-in subs," or you're posting to TikTok, Reels or Shorts and want captions that show with the sound off. Here's how to burn subtitles into video, whether you have no captions yet or already have an SRT file. You'll also see when closed captions are the better pick.
- Burned in is final. To fix a typo or remove the captions, you export the video again.
- Closed captions can carry several languages. Each language is its own subtitle file, and viewers pick one.
- Short vertical videos usually get burned-in captions. You choose the look, and it shows the same in every app.
- Already have an SRT file? In Selects you can import it, style it and burn it in without analysis. Importing, styling and exporting use no credits.
- Like someone else's captions? Paste a link to the video or a screenshot, and Selects copies the look. Save it as a preset for your next video.
Open captions vs closed captions: what's the difference?
Open captions are always on screen and can't be turned off. Closed captions can be shown or hidden by the person watching, as the W3C's accessibility guide on captions puts it.
You'll see a lot of names for the same two things. Burned-in captions, hard subtitles, hardcoded subtitles and hardsub all mean open captions. To hardcode subtitles is to burn them in.
Soft subtitles, subtitle files and SRT files usually mean closed captions. In everyday use, people say "captions" and "subtitles" for both, and this post does too.
| Open captions (burned in, hardsub) | Closed captions (soft subtitles) | |
|---|---|---|
| Where the text lives | In the picture itself | In a separate file or track |
| Can viewers turn them off? | No | Yes |
| Who controls the look | You: font, color, size, position, animation | Mostly the player or app. YouTube ignores style info in SRT files |
| Languages | One set, the one you burned in | One file per language, viewers pick |
| Fixing a typo after posting | Export and upload the video again | Replace the subtitle file |
| What you deliver | One video file | A video file plus a subtitle file |
So it comes down to who decides. Burned in, you control the look on every screen. Closed, viewers get the on and off switch and the language.
Which one should you use?
| Where the video goes | Use | Why |
|---|---|---|
| TikTok, Reels, Shorts | Burned-in captions | Your style shows the same on every phone. TikTok's own auto captions are optional and viewers can hide them |
| LinkedIn posts or ads in a feed | Burned-in captions | The captions show even when the sound is off, with no player setting involved |
| A client asked for "burned-in subs" | Burned-in captions | That's the file they asked for |
| A long YouTube video | Closed captions from an SRT file | YouTube Studio takes uploaded subtitle files, so viewers can turn them on or off |
| Several languages | Closed captions | One subtitle file per language. Burned in locks every viewer into the same text |
You can also do both. Burn captions into the vertical clips, and upload an SRT file with the long version.
How to burn subtitles into video with Selects
Selects is an AI video editor for Windows 11 and Macs with an Apple chip. Editing by hand and exporting are free.
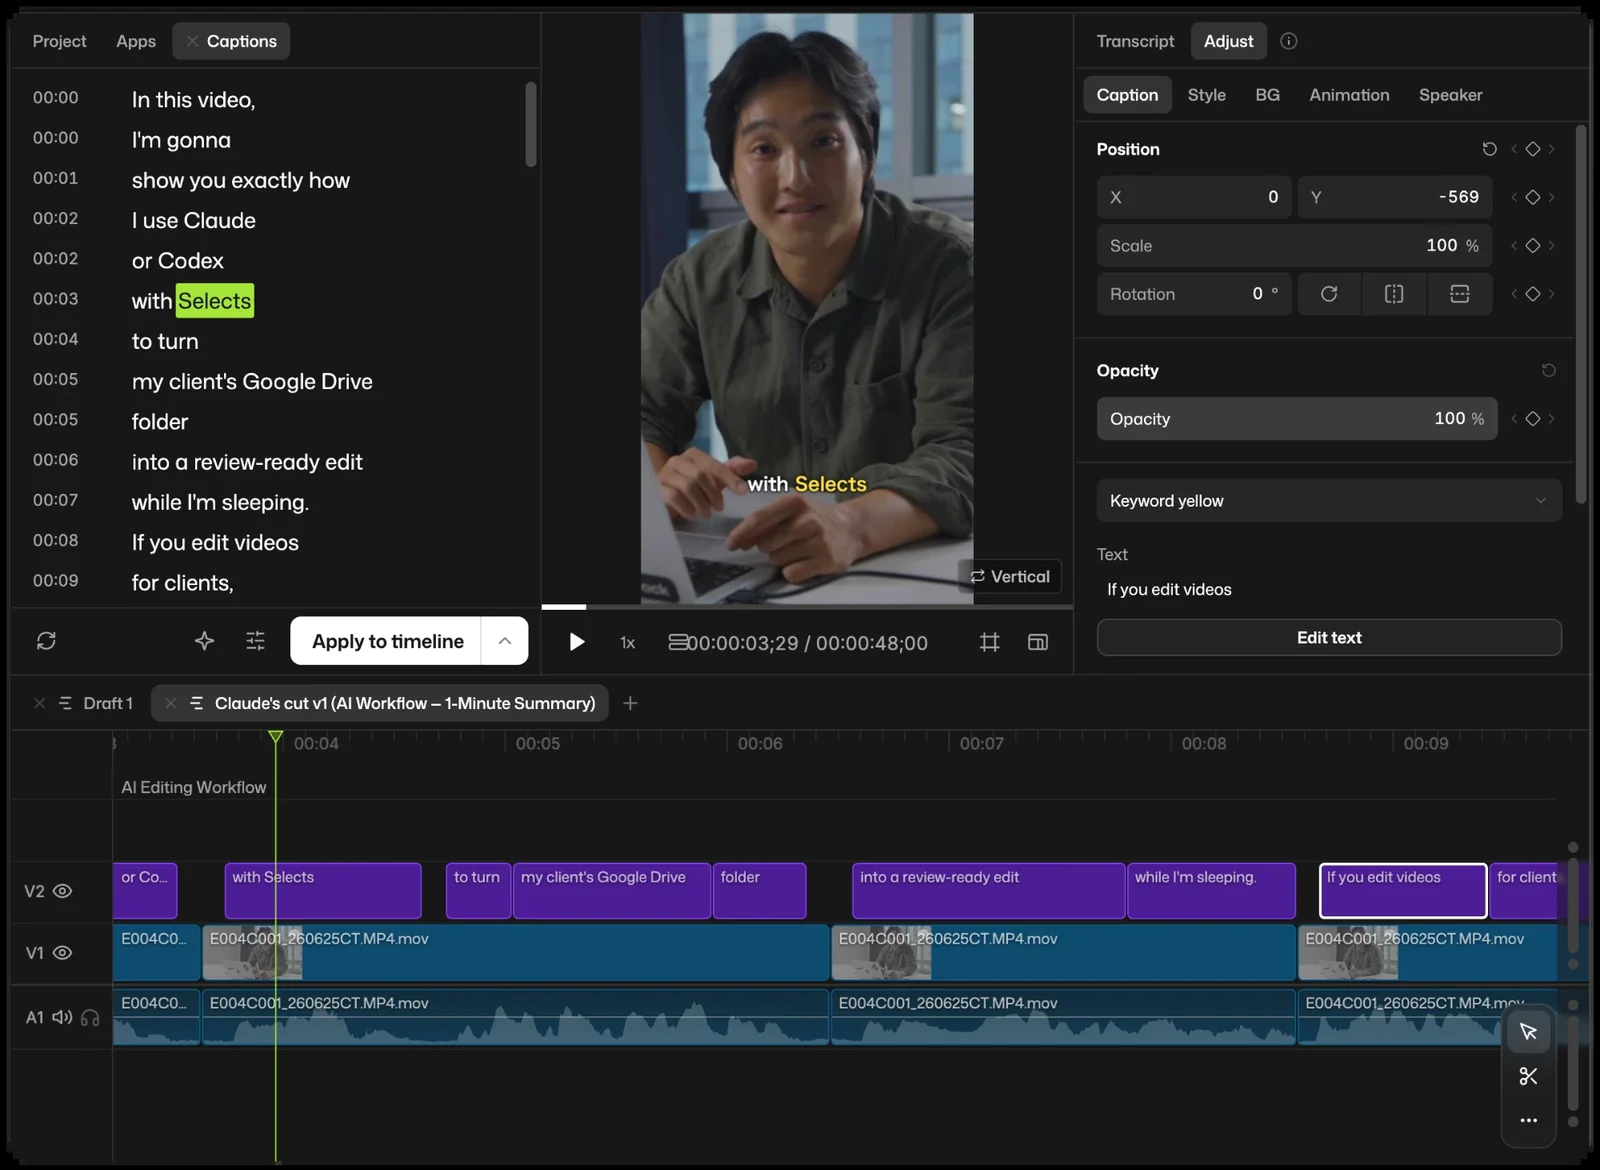
Step 1. Put your video in a draft
Drag your video onto the Home screen, and Selects makes a project for it. Selects then offers to analyze the video. What you choose depends on whether you already have captions:
- No captions yet. Click Analyze, so Selects has a transcript to turn into captions. Analysis uses 360 credits per hour of video. New users get 1,800 free trial credits, enough for about 5 hours, and then credits come with a paid plan.
- You have an SRT file. Click Cancel to skip analysis. The video can sit on the timeline unanalyzed, and you'll import the file in Step 2.
Then right-click the video in the project panel, where your files are listed, and choose Add to new timeline. That starts a draft, the timeline you edit and caption.
Do your cutting now, before you add captions. Captions are a snapshot of the draft, so cuts made afterward leave them out of sync.
Step 2. Create the captions
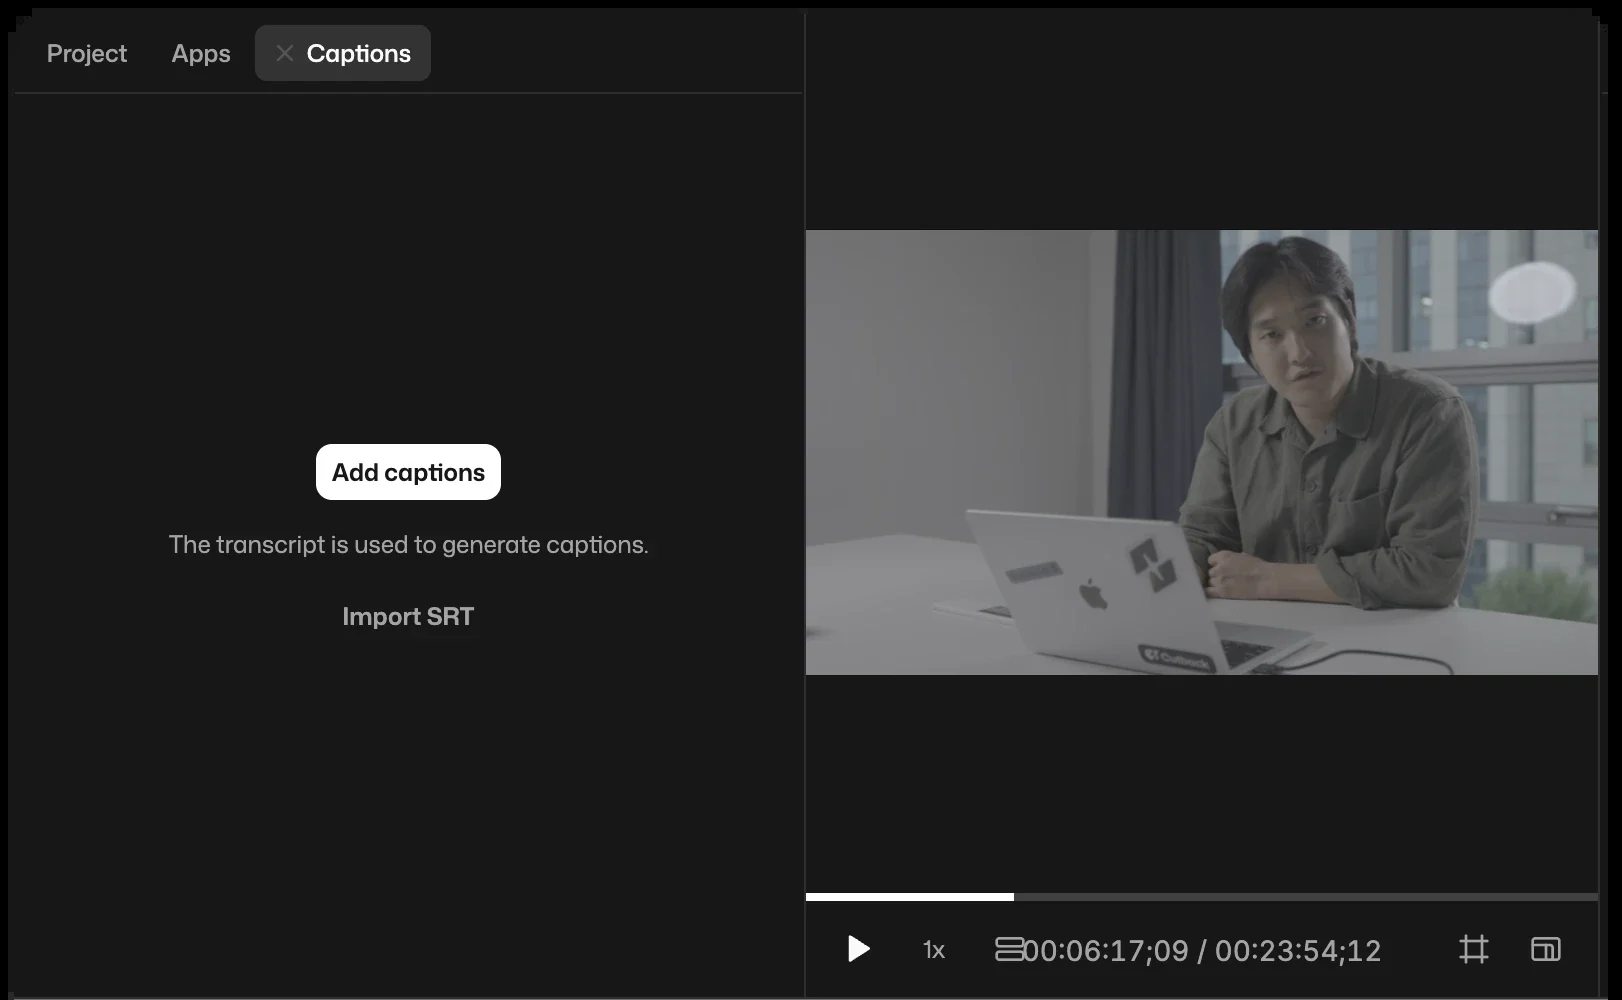
Open the Captions app from the Apps tab in the project panel. Then pick your starting point:
- Add captions builds them from the draft's transcript. Adding and applying captions doesn't use credits, since the transcript is already there.
- Import SRT reads your file instead. Selects places each line where the file times it, so the file's timing has to match this version of the video.
The caption list appears in the app first. Nothing is on your video yet, which gives you a chance to fix it.
Step 3. Clean up the text
Burned-in captions can't be fixed once the video is posted, so read them now. Double-click any word to correct it. If you hide a word, it leaves the captions but stays in the video.
Open Caption settings at the bottom of the app to shape the lines:
- Short lines. Turn on a maximum length per line. New lists start at 7 words, and Selects ends each line where a phrase ends.
- One or two lines. Multi-line shows two lines at once. Short vertical videos read best with one.
- Tidy text. Hide filler words like "um," switch to uppercase, or drop punctuation.
The Ask chat menu at the bottom of the app also offers Spell check and Natural line breaks. Chat on Selects' built-in models uses credits. If you pay for ChatGPT or Claude, you can connect that plan to run the chat instead.
Step 4. Pick a look and apply it
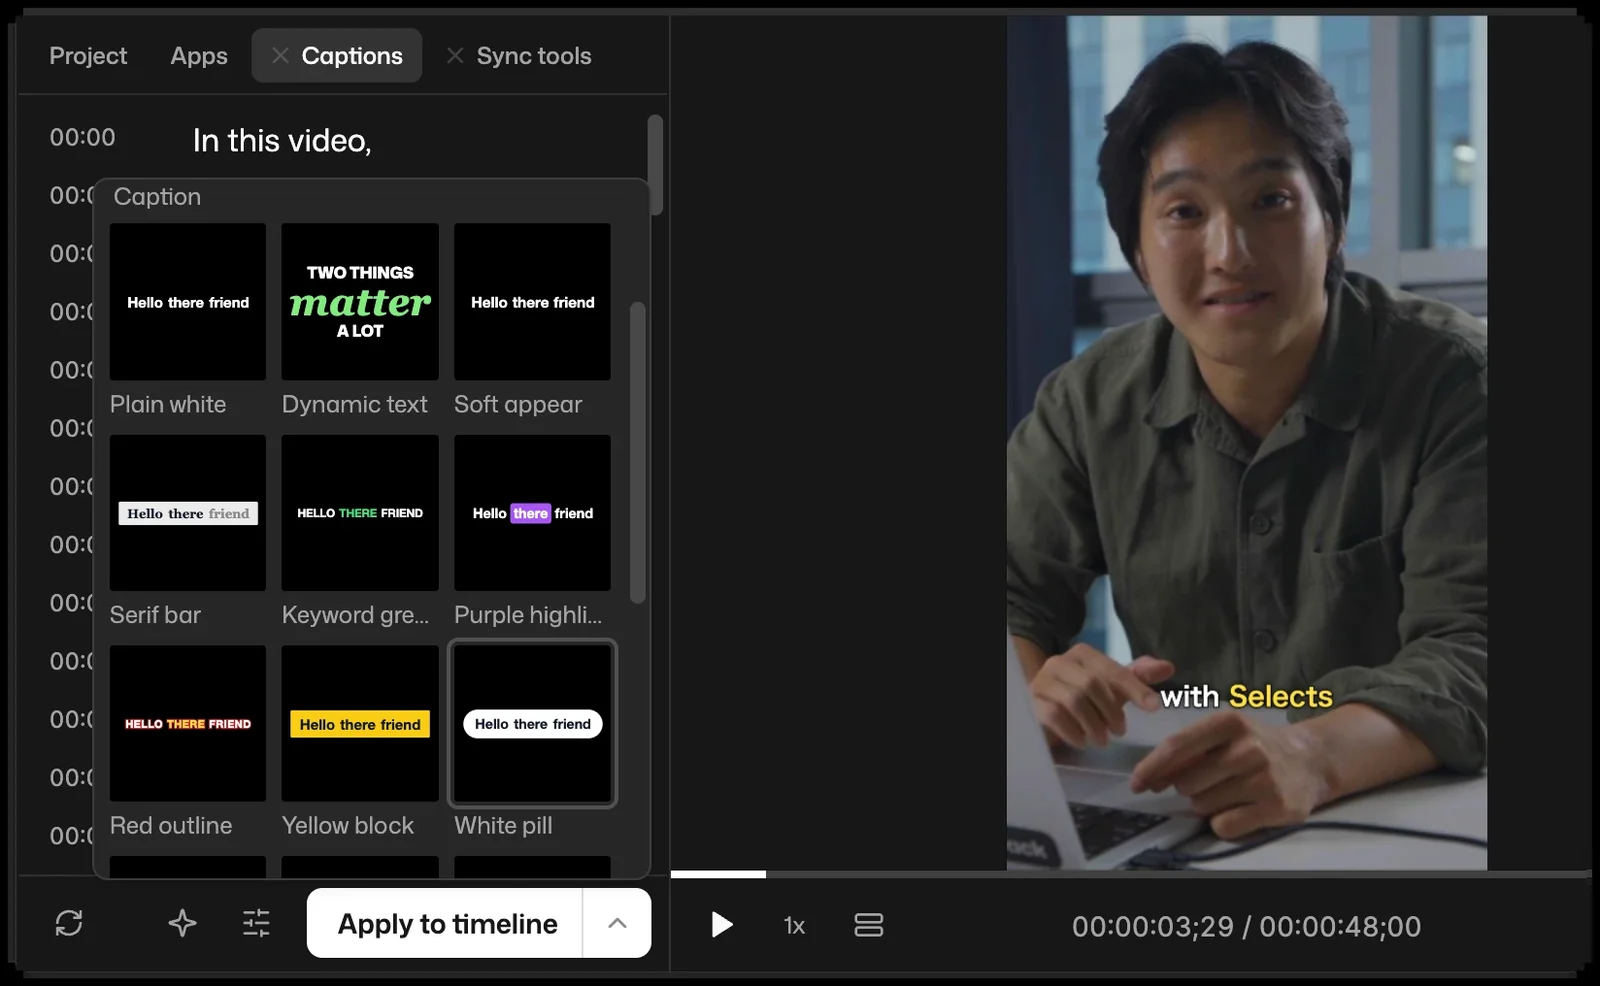
Click Apply to timeline to put the captions on your video in the plain white look. Click the arrow beside it to choose a built-in look instead, such as Keyword yellow, White pill or Dynamic text.
Want TikTok style captions, the bold kind where each word lights up as it's said? Pick a look that highlights the spoken word. Or ask chat for exactly what you want:
Use bold word-by-word captions. Make the spoken word yellow, and keep the lines short.
Selects builds word-by-word captions from the transcript. Start from a built-in look or describe your own, then save it as a preset. With an imported SRT file, Selects estimates when each word is said, because SRT files only time whole lines.
To change font, size, color, background, animation or position, select the captions and open the Adjust tab. Here's more on caption styles in Selects.
Step 5. Export with the captions burned in
Click Export, then Video. Everything showing on the timeline, captions included, is drawn into the picture of the new file. There's no separate burn-in switch to remember.
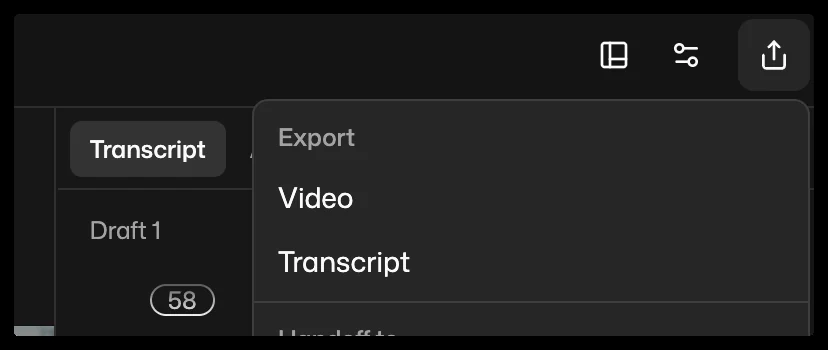
Choose a resolution (4K, FHD or HD) and where to save the file, then click Export. Exporting doesn't use credits.
You can also skip the file. Under Socials in the Export menu, you can post straight to TikTok, Instagram or YouTube. Selects renders the timeline with your captions burned in, then posts it to your account.
How to copy a caption style from a TikTok, Reel or YouTube video
Seen captions you love on someone else's video? You don't have to rebuild them by eye. Give Selects a link to the video, or a screenshot of it, and it copies that caption look onto your captions. It copies the look, not the clip, so nothing from the other video ends up in yours.
Option 1. Paste a video link
- Open your draft and make the captions, as in Steps 1 to 3.
- In chat, paste a link to the video, from TikTok, Instagram, YouTube or another social site. Say what to take from it, for example:
Copy just the caption style from this video and apply it to the captions on my draft. Keep my line lengths.
Starting a new project? On the Home screen, pick Shorts · Reels, then Copy a trending edit, and Paste a link. Add your footage and say what to take from the video, like only the captions, or the pacing too. Here's more on matching an edit from a link.
Option 2. Use a screenshot
No link, or the video is private? Take a screenshot of a frame where the captions show, add it to chat, and ask:
Match the captions in this screenshot: same font style, colors and size. Make the spoken word stand out the same way.
A screenshot shows how the captions look, but not how they move. If the words pop in or light up one at a time, say so in your message.
Fine-tune the look, then save it as a preset
Play back a few lines to check the match. To fix anything, like the font, size, color or position, select the captions and open the Adjust tab.
When it looks right, save it so you never have to match it again:
- Select a caption clip and open the Caption tab in Adjust.
- Click Save as preset.
Next time, click the arrow beside Apply to timeline, and your look is under Custom. Presets stay on your computer, so every project on it can use them.
Matching a style runs through chat, so it uses credits unless your own paid ChatGPT or Claude plan runs the chat. Applying your saved preset later doesn't use credits.
How to make closed captions instead
For soft subtitles, export the captions as a file and leave the picture clean:
- Make the captions in the Captions app, as in Steps 2 and 3.
- Click Export, then Transcript, choose Caption SRT file and click Export. You get one SRT file per language.
- Upload the file with your video, for example in YouTube Studio under Subtitles.
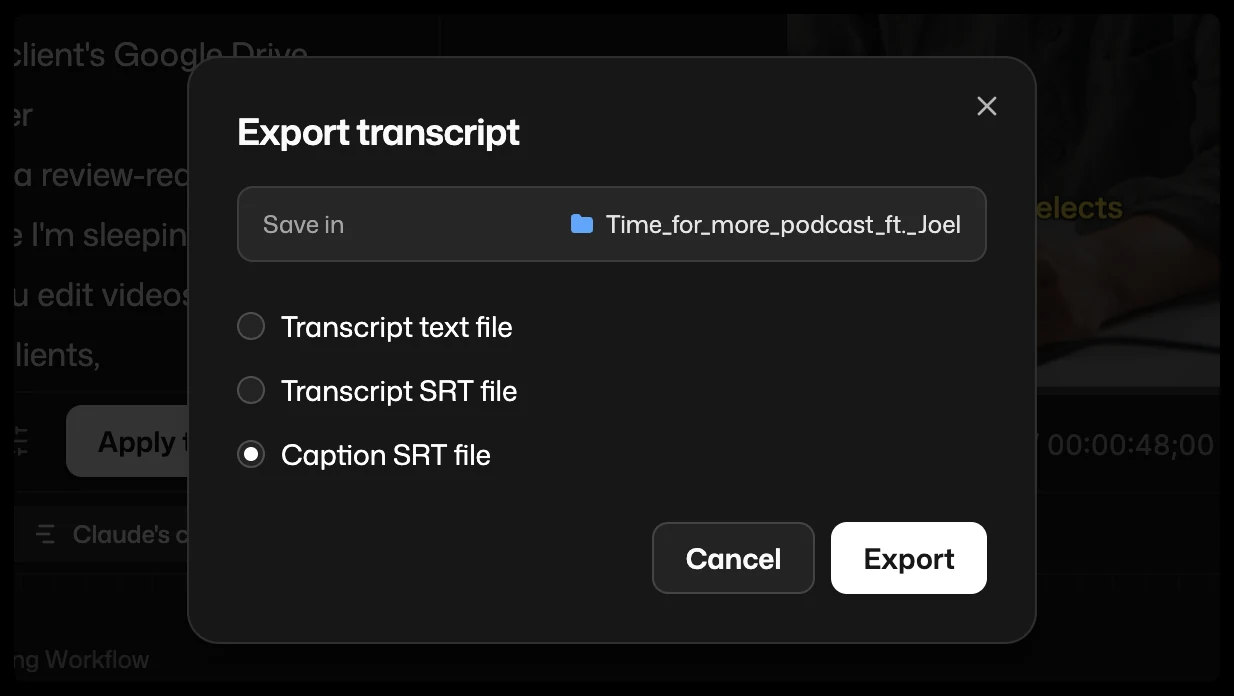
If the captions are already on your timeline, click Hide track on the caption track before you export the video. Otherwise viewers who turn on subtitles see two sets of text.
To add a language, choose Translate captions from the Ask chat menu and name the language.
Burned in, the translation shows under the original on its own track. As an SRT export, each language becomes its own file. Translation runs through chat, so it uses credits unless your own paid ChatGPT or Claude plan runs the chat.
For every setting, see the full guide to adding captions in Selects.
Tips and common mistakes
- Caption last. If you cut after captioning, Selects shows "Captions are out of sync." Rebuild them from the transcript, or import an SRT file that matches the new cut.
- Keep a clean version. Burned-in captions are permanent in that file. Keep the draft, and if someone needs a version without captions, hide the caption track and export again.
- Check it on a phone. Captions that look big on a monitor can be small on a phone. If app buttons or text cover them, move them up with Position in the Adjust tab.
- Don't caption twice. If you burn in captions, leave TikTok's auto captions off. Otherwise two lines of text fight for the same space.
Can you burn in an SRT file without an editor?
Yes, if your captions are already written and timed. HandBrake, an open-source video converter, can import an SRT file on its Subtitles tab. Its guide explains that a "hard burn" writes the subtitles onto the picture permanently.
It's a fine pick for a single file with finished captions. You'll still need to write or fix the captions somewhere else first.
FAQs
What is a hardsub?
A hardsub is a video with the subtitles burned into the picture. The text is part of every frame, so viewers can't turn it off or change the language. The opposite is a soft subtitle, a separate file the player can show or hide.
Can you remove burned-in subtitles from a video?
Not cleanly from the exported file, because the text has replaced those pixels. The practical fix is to go back to the project and export again without the captions. That's why it pays to keep your draft after you export.
Is it free to burn subtitles into a video in Selects?
If you already have an SRT file, yes: importing it, styling it and exporting don't use credits. Chat requests, like spell check or translation, do use credits unless your own paid ChatGPT or Claude plan runs them. If Selects has to write the captions for you, it analyzes the video first, and analysis uses credits.
Can I copy the caption style from a TikTok or Instagram video?
Yes. In Selects, paste a link to the video in chat, or add a screenshot, and ask for its captions on your draft. Selects copies the look, not the footage. Fine-tune it in the Adjust tab, then click Save as preset so every future project can use it.
Should I upload an SRT file or burn the captions in for YouTube?
For long YouTube videos, upload an SRT file so viewers can turn captions off or pick a language. For Shorts, burned-in captions give you a look you control. If you burn them in, don't also upload the same captions as a file.