How to Edit YouTube Videos: Steps, Cuts and Common Mistakes
How to edit YouTube videos, step by step: find the story, trim pauses and filler, pick J-cuts, L-cuts or jump cuts, then add B-roll, music and captions.

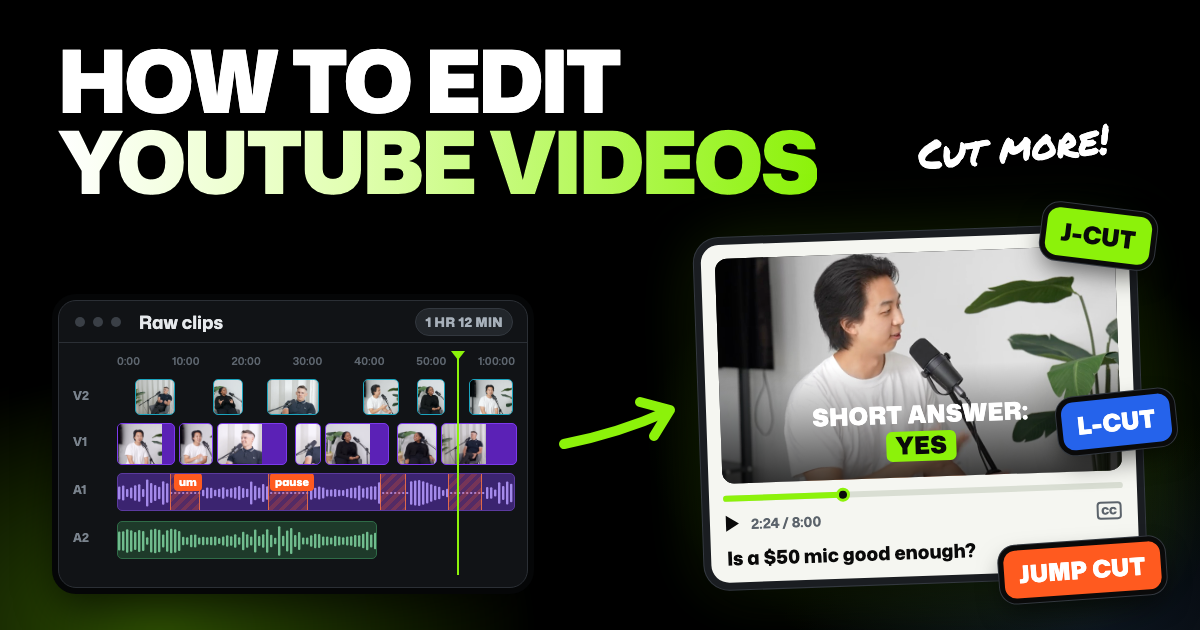
TLDR: To edit a YouTube video, cut your footage down to one story and open on the best moment. Trim pauses, retakes and filler, then cover the cuts with B-roll, captions and music. Use J-cuts and L-cuts to smooth scene changes, and jump cuts to tighten talking and shrink long activities.
You filmed something: you talking to camera at your desk, or a whole day out with food and a view. Now there's an hour of clips and you want a YouTube video people actually watch till the end. This guide shows how to edit YouTube videos step by step, from the first rough cut (a loose first version) to the upload. The examples follow a day-out vlog, and every step works for talking-head videos too.
- Story before polish. Decide what the video is about and who is it for before you touch a transition.
- Your voice carries the edit. Build the cut around what you said, then lay the visuals over it.
- Leave a breath where it counts. Trim pauses, but keep a beat after a joke or a big view.
- Cut more than feels comfortable. A first cut almost always runs long. Always ask yourself, is this line or a really good looking shot ADDING anything to the story or making the viewer feel anything. If not, then cut it.
Talking-head videos and vlogs: what changes
Every step below works for both. A talking-head video (you speaking to camera, often from a script or outline) is built from your words. Most of the work is cutting pauses, retakes and filler, then adding B-roll and text so the picture doesn't sit still.
If you are working out how to edit a vlog, the big difference is that it has no script. You find the story in the footage after you film it, so the first pass takes the longest.
Step 1. Decide the story and the length
Write one sentence about what the video is about. For a vlog, "A rainy day in Lisbon that turned out better than planned" lets you cut the 20-minute museum queue. For a talking-head video, it's the question your title asks, like "Is a $50 microphone good enough for YouTube?"
Pick a target length too, like 8 minutes. If a part doesn't serve the sentence, it's a cut, however nice the shot.
Casey Neistat (12.7 million subscribers) puts story first in his vlogging tutorial. He calls it the most important thing, because the story is what drives the video.
Vlogger Kariza of Life of Riza turns that into a rule in an interview with Digital Spaghetti. Every vlog has a problem or conflict, then a resolution, in a simple three-act structure.
Step 2. Sort your clips into talking and B-roll
Split your footage into two groups. Talking clips are the ones where you speak to the camera. B-roll is everything else: the street, the food, the view, the shots that play over your voice.
Back up the original files before you start, so nothing is lost if you delete the wrong clip.
Step 3. Build the rough cut around what you said
Put your talking clips in story order on the timeline, the strip where your clips sit side by side. Don't add B-roll yet. Listen through once and drop every line that doesn't move the story.
In the same interview, Kariza says every scene should have a purpose. A shot moves the story from point A to point B, so each scene gives viewers the next new piece of information.
Cut repeats while you're here. If you explained the hotel twice, keep the better take and drop the other. If your editor makes a transcript, reading it shows repeats faster than dragging back and forth through the video.
YouTube consultant Film Booth shows how much repeats cost in his video on common editing mistakes. Re-editing Graham Stephan's first video, he counts 48 repeats in 11 minutes, which stops the video moving forward. His advice: check whether every second is needed.
Step 4. Open on the best moment
Many viewers decide in the first few seconds whether to stay. Open with the funniest, prettiest or most surprising moment, then go back to the start. In a talking-head video, that's a one-line preview of the answer your title promised.
The opening also has to deliver what your title and thumbnail promised. If the thumbnail shows the view from the top, show a glimpse of it early, so viewers know it's coming.
MrBeast's version, from interviews compiled by Aprilynne Alter: show viewers right away that they're getting what they clicked on. Then give them more than they expected.
Step 5. Trim pauses, retakes and filler
Cut the gaps between your sentences, the "um" before you start and every false start. A tight edit feels confident, even when the day was relaxed.
Leave a breath where a joke lands or a view needs a second to sink in. Cutting every pause makes a video feel rushed.
Film Booth warns against over-cutting in the same video. Don't jam clips together just to remove tiny gaps. Make the cuts feel natural, because editing isn't a race to make the video as fast as possible.
When I edit a talking-head video, I leave 2 to 3 frames of silence after each word and before the next one at every cut. There's no clipped sound, and not enough silence to feel awkward.
Pacing still depends on the video. Informational talking-head videos need a faster pace for today's shorter attention spans. In a vlog, a longer pause can carry emotion, so leave more room there.
J-cuts, L-cuts and jump cuts: which cut fits where
Three kinds of cut come up again and again in YouTube videos. Here's what each one does in plain words, with full definitions in our video editing terms glossary.
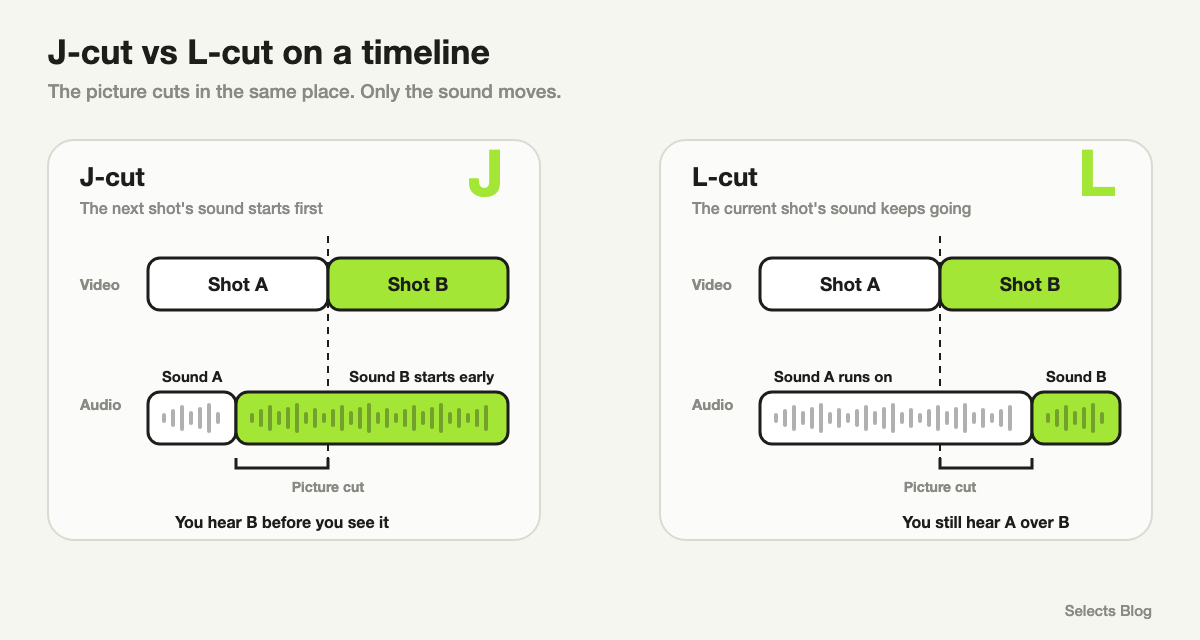
- J-cut. You hear the next shot before you see it. The sound of the market starts while you're still talking in the car, then the picture follows.
- L-cut. The sound of one shot keeps playing over the next picture. You keep talking about the market while viewers already see the stalls.
- Jump cut. A piece is cut out of the same shot, so time seems to skip. Ten minutes of hiking, filmed in one long take, becomes a few seconds of quick jumps along the trail.
In my experience, J-cuts and L-cuts work well for talking heads and vlogs, and jump cuts work for long action sequences.
Film Booth explains why J-cuts help talking videos: with a plain cut, every new clip stops the story for a moment. StudioBinder shows jump cuts shrinking time in a montage, and Fandor shows J-cuts and L-cuts giving a conversation a natural flow (both linked below).
The J-cut and L-cut get their names from the letter shape the sound and picture make on a timeline. Here's where each cut fits in a typical YouTube video:
| Moment | Cut to use | Why it works |
|---|---|---|
| Talking to camera, then moving to a new place | J-cut | The new place's sound pulls viewers into the next scene before the picture changes |
| Talking about something viewers should see | L-cut | Your voice keeps going while B-roll shows what you mean |
| A long walk, drive, climb or cooking session | Jump cut | It keeps the feeling of the activity without the full length |
| Long stretches of talking to camera with pauses | Jump cut | It removes pauses and restarts, and keeps the pace up |
A few jump cuts in a talking section look natural, since YouTube viewers expect them. Too many in a row feel twitchy, and that's where B-roll helps.
Step 6. Cover your cuts with B-roll
Lay B-roll on the track (row) above your talking clips, so it plays over your voice. Match it to what you're saying. When you mention the coffee, show the coffee.
B-roll also hides the jump cuts that trimming pauses left in Step 5. A two-second shot of the street over a cut makes the skip disappear.
Step 7. Add music, sound and captions
Music sets the mood, and a little sound effect can sell a joke. Use music you have the rights to, and keep it low under your voice.
In 5 ways to make better videos, Peter McKinnon (6 million subscribers) says the right music and sound effects change how people see your footage. He chooses the song carefully, then edits to the music.
Music can also lead a scene change, like a J-cut. Kariza brings the next scene's music in 4 to 5 seconds before viewers see what's happening. She trusts viewers to put the pieces together, without saying "Okay, we're doing this now."
Add captions too, so anyone watching with the sound off can still follow along. Keep any on-screen text short and easy to read, and use it only for key points.
For YouTube, you have two ways to add captions:
- Burn them in when you want styled, on-brand captions that always show. The text becomes part of the picture.
- Upload an SRT file (a separate subtitle file) with your video in YouTube Studio. Viewers can turn the captions on or off, and you can add other languages as their own files.
Our guide on how to burn subtitles into a video compares the two and shows how to do each.
Step 8. Export and upload to YouTube
Save the finished video at the same frame rate (frames per second) you filmed in. Planning an end screen? Leave room for it, since YouTube end screens can appear in the last 5 to 20 seconds of a video.
By default, YouTube accepts uploads up to 15 minutes long. Verify your account on YouTube before you upload a longer video.
How to edit YouTube videos faster in Selects
Any video editor with a timeline can do the steps above by hand. The slow part is Steps 3 to 6 above: watching every clip, finding the lines that matter and trimming pauses. Selects, an AI video editor, can do that first pass for you from a short brief.
Editing by hand and exporting are free in Selects. The AI steps below need Selects to analyze your footage first, and analysis uses credits.
Step 1. Add your clips and let Selects analyze them
With the chat box empty, drag all your files onto the Home screen (talking clips, B-roll, voice audio, music and sound effects), and Selects makes a project. Say yes when it offers to analyze them. Selects watches and listens to every clip, so it knows what you said, when you said it and what's on screen.
Analysis uses 360 credits per hour of footage. New users get 1,800 free trial credits, enough for about 5 hours, then credits come with a paid plan. Your video files stay on your computer, since Selects never uploads them.
Step 2. Organize your files
Chat is the AI assistant built into Selects. Before you edit, ask it to sort your files into folders. An organized project is much easier to work with, and every later request can point to a folder by name. Chat uses credits, unless you connect a paid ChatGPT or Claude plan to run it.
Sort my files into folders: A-roll (me talking to camera), B-roll, Voice audio, Music and SFX. Split the B-roll into one folder per location. Give each folder's clips their own color label, and put anything you're not sure about in a Review folder instead of guessing.
Selects sorts by what's in each clip, not just by file name, because analysis has already watched and listened to everything.
Step 3. Ask chat for a rough cut
Describe the video in chat the way you'd brief an editor.
Turn these clips into an 8-minute YouTube vlog that answers one question: was my rainy day in Lisbon worth it? Open with the 5 to 10 seconds that best answer it, then go in order of the day. Keep what I say to camera, using my last clean take, and cut false starts. Put street B-roll over the parts about the city, and close with my reflective talking part.
Your draft appears on the timeline. Watch it once, then give notes like "the museum part drags, cut it to 30 seconds."
Step 4. Tighten the talking and the action
Ask chat to remove retakes, and it groups the takes of each line and keeps the best one. To tighten pauses, use Remove silence in the Apps tab, or ask chat for a pace like "tight" or "jump cut." The numbers between words in the transcript show each pause in frames, so you can ask for an exact gap: "Remove silences, leaving 3 frames after each word and before the next." Cut filler words, also in the Apps tab, removes "um" and "you know," on English footage only.
Handheld footage, common in vlogs, often has shaky or blurry stretches. Ask chat to check for them, and it marks them, then cuts them on request. It doesn't stabilize footage, so those parts are removed, not fixed.
For long activities, ask chat to keep only the action, like "cut the hike down to the best climbs." That works because analysis reads the picture, not just your words.
A professional editor on our team tested this on 17 minutes of parkour footage with no speech to work from. Each tool was asked for a highlight of every attempt.
Selects found 6 valid attempts, Claude on its own found 2, and Premiere Pro's AI Assistant and Descript found 1 each. It was one run per tool, and the full results are on our comparison page.
Step 5. Add B-roll and captions
Ask chat to place B-roll over specific lines: "When I talk about the food, show the food shots, and keep my voice running underneath." Chat finds the shots by what's in them, not by file names. Your voice keeps going over the new picture, which gives the L-cut effect from the table above.
Need a shot you didn't film, like a wide view of the city? Chat can generate one, and generated media uses credits.
For captions, open Captions in the Apps tab and add them from your transcript, then pick a style. To upload them to YouTube as a separate SRT file instead, click Export, then Transcript, and choose Caption SRT file.
Step 6. Post to YouTube from the Export menu
Click Export at the top right, then choose YouTube under Socials. Connect your channel once, fill in the title, visibility and audience, and publish. Selects uploads the video for you, so keep the app open until it's done. Any captions on your timeline are burned into the posted video. For closed captions, click Hide track on the caption track before you post, then upload the SRT file in YouTube Studio.
For every field and the video limits, see how to publish your video to YouTube from Selects.
Common YouTube editing mistakes
- Opening with the first clip you filmed. Open on your strongest moment instead, then go back to the start.
- A slow intro. A long "hey guys, so today" loses viewers before the video starts.
- Saying the same thing twice. Keep the better version and cut the other.
- Music louder than you. If viewers strain to hear you, they leave.
Videos worth studying (and what each teaches)
These four videos from YouTube creators go deeper on the workflow, story and cuts above.
- How to Edit Your First Vlog Without Feeling Overwhelmed, from Katie Steckly. Editing a vlog by hand in DaVinci Resolve, step by step, in 24 minutes. What it teaches: organize your footage, rough cut the intro, add B-roll and punch-in zooms, and end the music with the scene. In Selects, chat speeds up most of those steps: it sorts your files, builds the rough cut and places B-roll over the right lines. Zooms and audio fades are in the Effects app, and chat and analysis use credits.
- SFX Secrets: The J Cut & The L Cut, from Fandor. Film clips show both cuts in under 5 minutes. What it teaches: J-cuts and L-cuts give a conversation a more natural flow. At a scene change, a J-cut feels urgent, while an L-cut lets the moment linger.
- What is a Jump Cut & When to Use It, from StudioBinder. Five ways films use jump cuts. What it teaches: in a montage, jump cuts shrink time, which is what a long hike or drive needs. Its closing exercise shows how to hide a jump cut by changing the camera angle by at least 30 degrees.
- These 3 Rules Reinvented the Vlog | Ft. LifeOfRiza, from Digital Spaghetti. An interview with vlogger Kariza of Life of Riza about how she builds her vlogs. What it teaches: give every vlog a problem and a resolution, and make every scene move the story from A to B. She also brings the next scene's music in 4 to 5 seconds early.
FAQs
What is the difference between a J-cut and an L-cut?
In a J-cut, the next shot's sound starts before its picture. In an L-cut, the current shot's sound keeps playing after the picture has changed. Both make cuts feel smoother, because the sound bridges the change.
Are jump cuts bad in a YouTube video?
No, jump cuts are normal on YouTube, in talking-head videos and vlogs alike. They cut pauses out of talking sections and shrink long activities to a few seconds. Too many in a row can feel choppy, so cover some with B-roll.
How long should a YouTube video be?
As long as the story holds your viewers, and no longer. There's no right number of minutes. Cut anything that doesn't serve the one sentence your video is about, and the length follows.
Can AI edit my YouTube videos?
AI can do the slow first pass: finding your best lines, trimming pauses and retakes, and placing B-roll. You still decide what the story is and what feels right. In Selects, the AI steps need your footage analyzed first, which uses credits.