Talking Head Video: How to Make and Edit One
What a talking head video is, how to set one up, and how to edit it: keep the best takes, cut pauses, and hide jump cuts with zooms and B-roll.

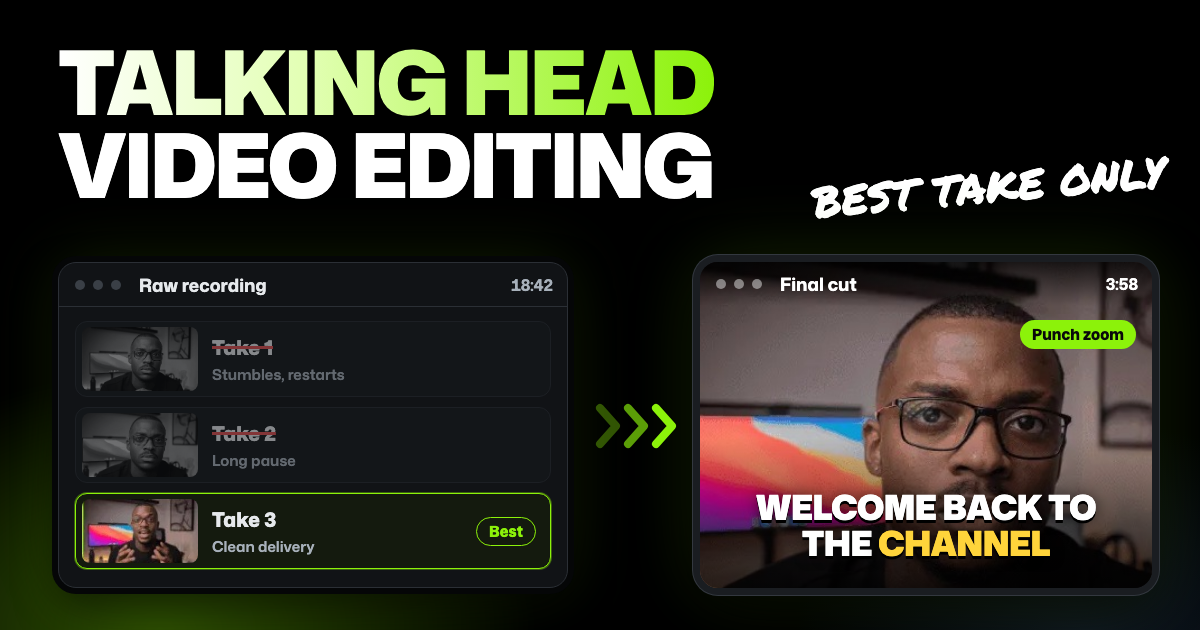
TLDR: A talking head video is one person speaking straight to the camera, usually framed from the chest up. To make one, put the camera at eye level, face a soft light and keep the mic close. Then edit the words first: keep the best take of each line, cut long pauses and filler, and hide cuts with zooms and B-roll.
You pressed record and talked to the camera for 20 minutes, with restarts, long pauses and lines said three times. You want a tight few minutes that people watch to the end, without losing your evening to it. This guide covers the setup, then the edit, by hand or with an AI video editor.
- Sound before picture. Viewers forgive imperfect light sooner than muddy audio.
- Your last take is usually the keeper. Skip ahead to it instead of hearing every attempt.
- Fix the words, then the look. Takes and pauses first; zooms, B-roll and captions last.
- Change the picture now and then. Attention drifts when your face never changes size.
What is a talking head video?
A talking head video is one where the main thing on screen is a person talking to the viewer. The frame usually shows the head and shoulders, or the chest up. The name comes from TV news and documentaries, where an interview shot of someone talking is called a "talking head."
Common examples are YouTube explainers, course lessons, LinkedIn updates and vertical talking clips for Shorts and Reels.
Unlike a vlog, it happens in one place and is built from your words. So most of the editing is choosing takes and cutting pauses. A vlog with lots of locations is a different edit, built more from footage than from words.
How to make a talking head video: the setup
You don't need a studio. A phone, a window and a cheap clip-on mic get you most of the way.
Put the camera at eye level
Raise the camera until the lens is level with your eyes, and look at the lens, not the screen. A camera below you looks up your nose, and one above makes you look small. Frame yourself from the chest up, with a little space above your head.
Face the light
Sit facing a window, or put one soft light in front of you and slightly to one side. Never sit with a bright window behind you, or your face turns into a dark shape. YouTube's own equipment tips say a single soft light can be great for close-ups, and daylight is free.
Get the mic close
YouTube's tips call good sound a must: viewers put up with imperfect lighting more than poor sound.
With a camera's built-in mic, YouTube says you may need to stay 3 to 4 feet from the camera for the best sound. A clip-on (lavalier) mic stays close to your mouth wherever the camera is.
Record so the edit is easier
When you stumble, restart the whole sentence instead of picking up mid-line. Every take is then complete, and cutting between them is easy.
Think Media (3.5 million subscribers) adds two habits in its video on editing talking head videos:
- Stay in the same position and at the same voice level when you restart. Cuts between takes then look smoother.
- Say it out loud when an earlier take was better. The presenter says something like "I'm using the one back" on camera, then spots it while editing. He adds that his last take is his best about 95% of the time.
If you edit in Selects, chat can look for cues like these for you. Step 2 of the Selects section below shows how.
How to edit a talking head video, step by step
Any editor with a timeline (the strip where your clips sit in order) can do these steps by hand. Do them in this order, since each one changes what the next has to fix.
Step 1. Keep the best take of each line
Keep one take of every line, usually the last. Delete the false starts, the "okay, again" and the half sentences. The Think Media presenter skims the sound wave to find where each attempt starts, instead of listening to all of them.
This step decides the length. A professional editor on our team tested five AI tools on the same job. Each got a script and a 7 minute 13 second talking head recording full of retakes. A human editor's cut ran 1:58.
The cuts ran 2:00 in Selects, 2:12 in Descript, 2:14 in Premiere Pro's AI Assistant and 2:16 in Claude (working alone). CapCut's cut ran 3:30 and kept retakes, including two lines said three times each. Each tool got one run; see every result on our comparison page.
Step 2. Cut long pauses and filler words
Now trim the gaps between sentences and the "um" before you start talking. Amy, who has edited for the LegalEagle channel, starts the same way in an interview on The Editing Podcast. Her first pass removes the ums, the pauses and the dead air.
My rule for sit-down videos: any pause over 0.8 seconds gets trimmed, except the beat after a joke and the one right before a key point.
Where I do cut, I keep 2 to 3 frames of silence on each side. Words don't sound chopped, and the join doesn't feel like a gap.
So the first rule decides which pauses go, and the second decides how much silence stays where you cut. A frame is one still image of the video, so at 30 frames per second, 3 frames is 0.1 seconds.
Step 3. Hide the jump cuts with punch-in zooms
Each of those cuts is a jump cut, so your head jumps slightly at every one. A handful is fine; a long run of them is tiring to watch.
The simplest fix is a punch-in. Zoom in slightly on the clip after a cut, then back out at the next one. Think Media calls this cropping in and out, and shows it making two takes look like one continuous piece.
If you film in 4K and edit in 1080p, you can punch in without the picture going soft. Save the bigger zooms for the lines you want to stress.
Step 4. Add B-roll so the picture changes
B-roll is extra footage that plays over you talking: the product you mention, a screen recording, a chart. It covers jump cuts too, since viewers see a new picture instead of your head jumping.
Amy's first rule for talking head videos is not to stay on the talking head too long. People are drawn to variety, she says, and a quick cut to something unexpected works like a reset button. She also warns that piling on music, graphics and sound effects can distract from what the video is trying to say.
J-cuts and L-cuts work well in talking heads, in my experience. With B-roll, that usually means an L-cut: your voice keeps going while the picture moves to the new shot. (A J-cut is the reverse: the next shot's sound starts just before you see it.)
Step 5. Add captions
Captions keep people watching when their sound is off. Keep one or two short lines on screen at a time, and read them once for misspelled names and product terms.
Step 6. Watch it as a viewer, then export
Watch the whole video once without stopping. Amy cuts to something different when she notices her own attention drifting, and steps away when she needs fresh eyes and ears. Wherever you get bored, cut or add a cutaway.
Export at your recording's frame rate. Then pick the shape: wide (16:9) for YouTube, tall (9:16) for Shorts, Reels and TikTok.
How to edit a talking head video in Selects
Steps 1 and 2 above, picking takes and cutting pauses, take most of the time in talking head video editing. In Selects you hand that first pass to the built-in chat assistant, then check it and finish the look yourself. For a quick overview of what Selects does with this kind of footage, see our talking head video editor page.
You can do every step by hand and export at no cost. The AI steps need your footage analyzed first, and analysis uses credits.
Step 1. Bring in your recording and let Selects analyze it
Drag your recording onto the Home screen (leave the chat box empty), and Selects creates a project for it. You can also record straight into a project with the Record app, which captures your camera and mic at up to 1080p.
Say yes when Selects offers to analyze the footage. Analysis gives Selects every word with its timing, plus a sense of what's on screen in each take. Only the audio and still frames leave your computer; the video file itself stays put.
Expect 360 credits per hour of video. New accounts start with 1,800 free trial credits (roughly 5 hours of footage); after that, credits come with a paid plan.
Step 2. Ask chat to keep the best take of each line
Selects' chat assistant knows which takes are attempts at the same line, because analysis groups them. Ask it to pick one per line:
Make a tight edit of this recording. For every line I repeated, keep the best take, usually the last one, and remove the other attempts and false starts. If I said on camera to use an earlier take, follow that and list where you did.
You can also check takes yourself. Takes review on the timeline stacks every take of a line above your clip, marks the best one and says why.
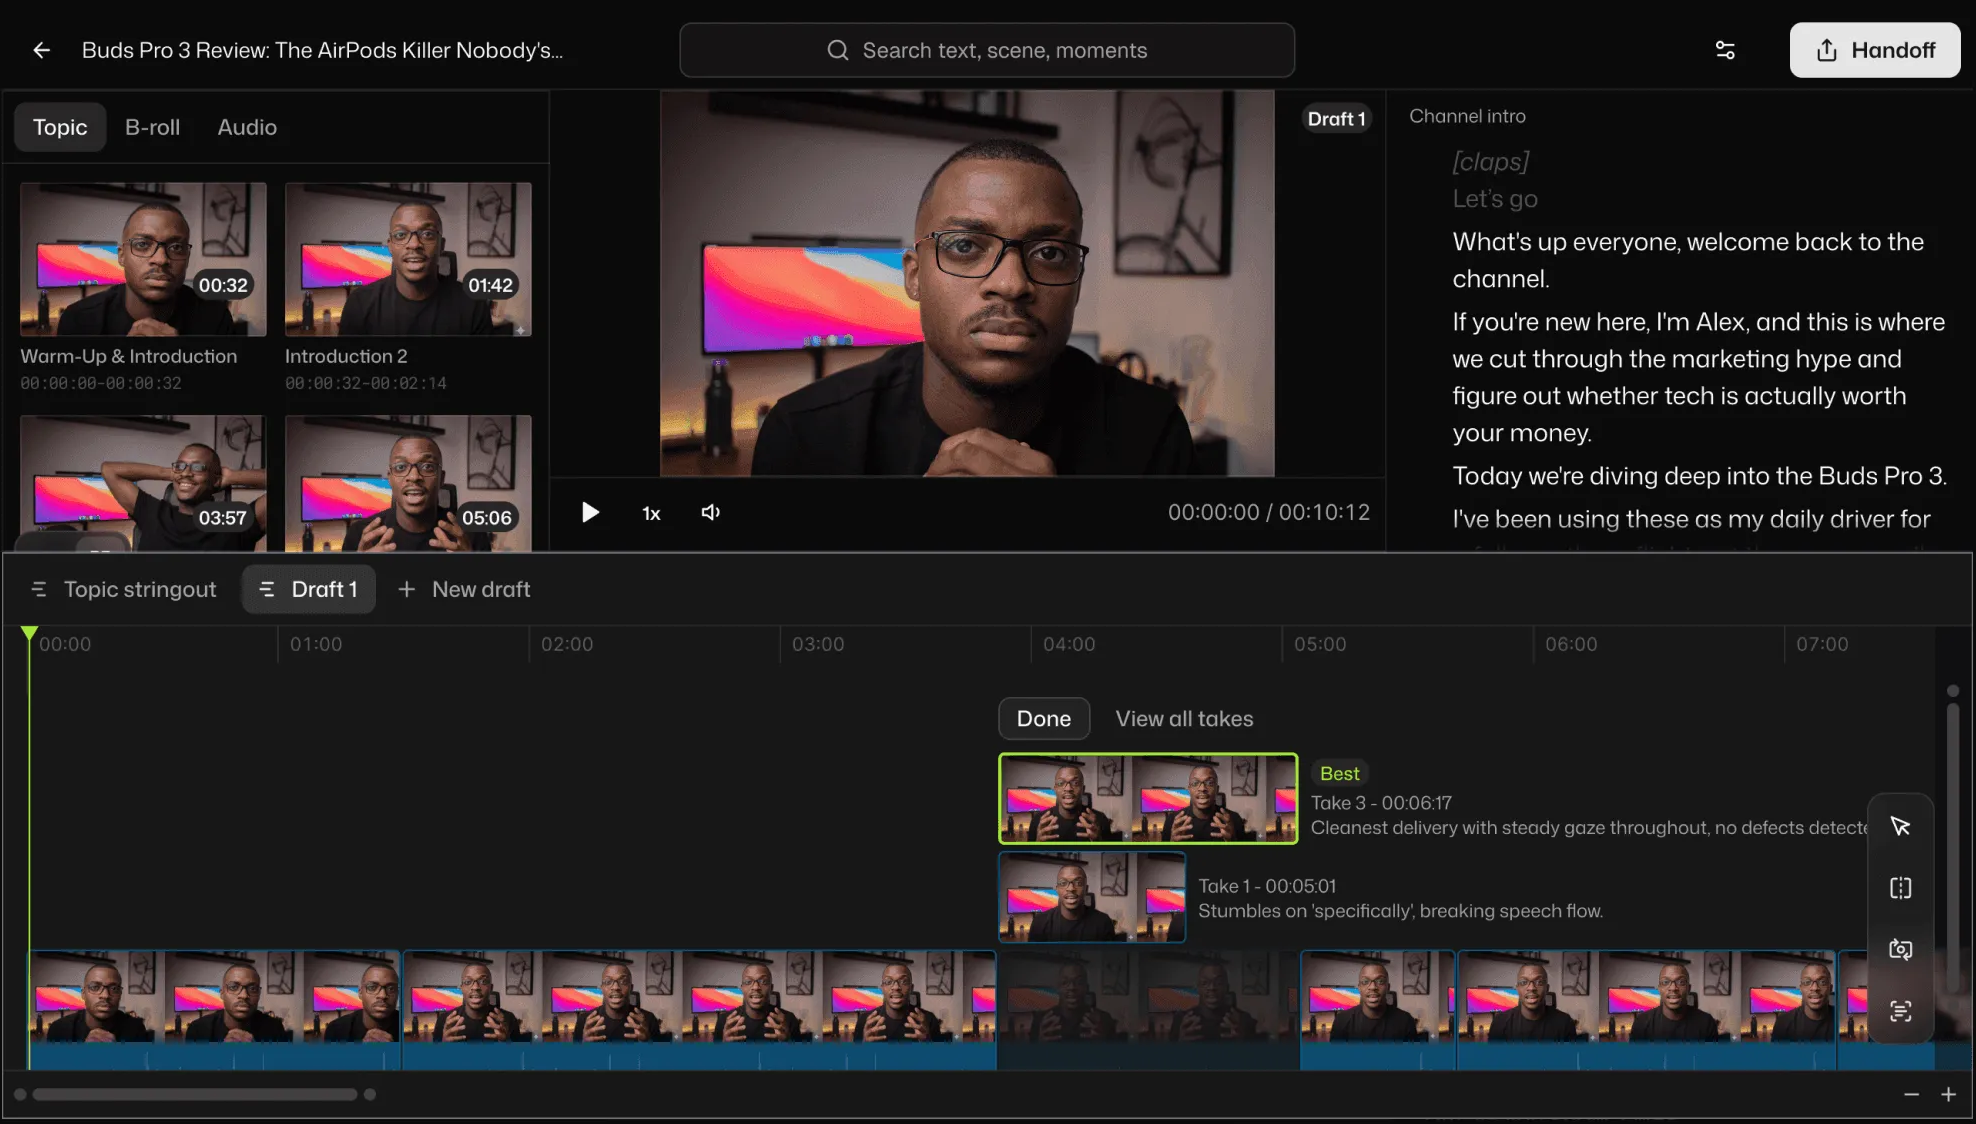
Worked from a script? Attach it as a .txt, .docx, .pdf or .md file, and chat matches each line to the take you meant. Requests to chat cost credits too; in the desktop app, a paid ChatGPT or Claude plan can cover them instead.
Called your takes out loud while filming? Chat can follow those cues too. The transcript from analysis is more than captions: chat can read it as a list of editing instructions.
Say your cues naturally, like "disregard that," "retake" or "start from here." Then send this prompt first, before the best-take one:
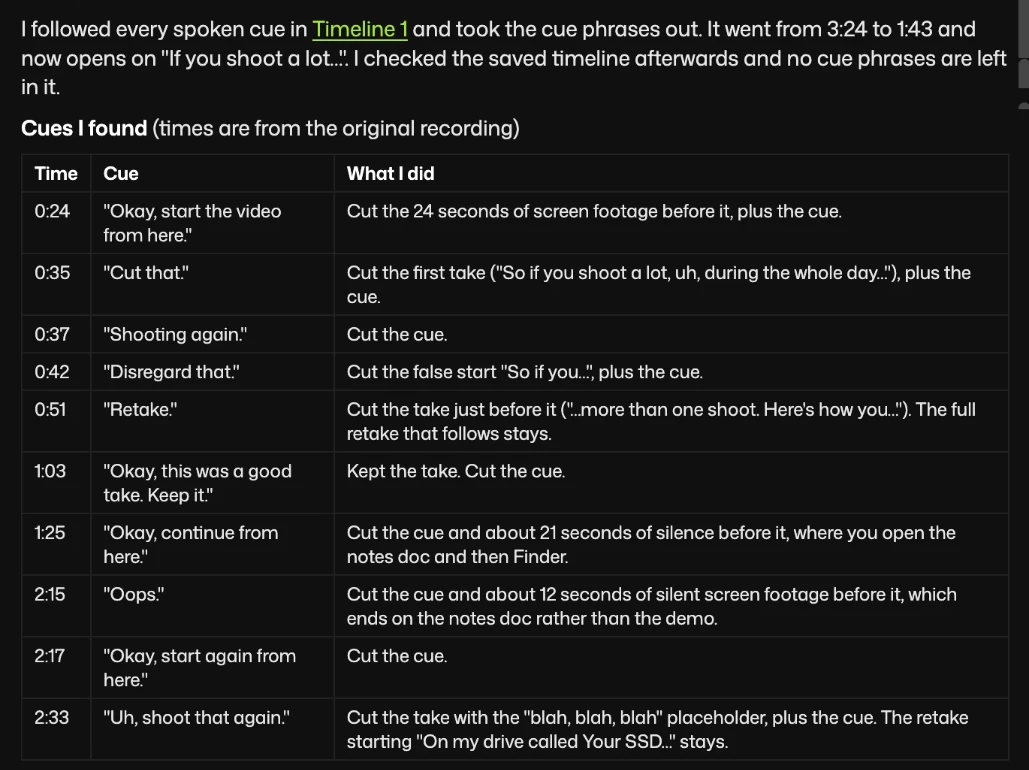
I gave spoken editing cues while filming, for example "disregard the last take", "let me try that again", "cut this next part", "this is important, keep it", and "start / end the video here". Find every cue, follow it, and remove the cue phrases themselves from the edit. Before you finish, list each cue you found with its timestamp and what you did.
Here's what I got when I tested this on a short, 3 minute 24 second clip. It was a screen recording where I talked through each step and gave cues in my own words. Chat found 10 cues, including wordings that weren't in the prompt. It cut the bad takes and the cue phrases, and the clip went from 3:24 to 1:43.
It also said which cues from the prompt it couldn't find, instead of guessing. Chat checked its cuts against the transcript, not by listening, so play back each one.
Here's how chat cut the video. Everything it removed is grayed out in the transcript: the cues themselves, and the parts my cues told it not to use.
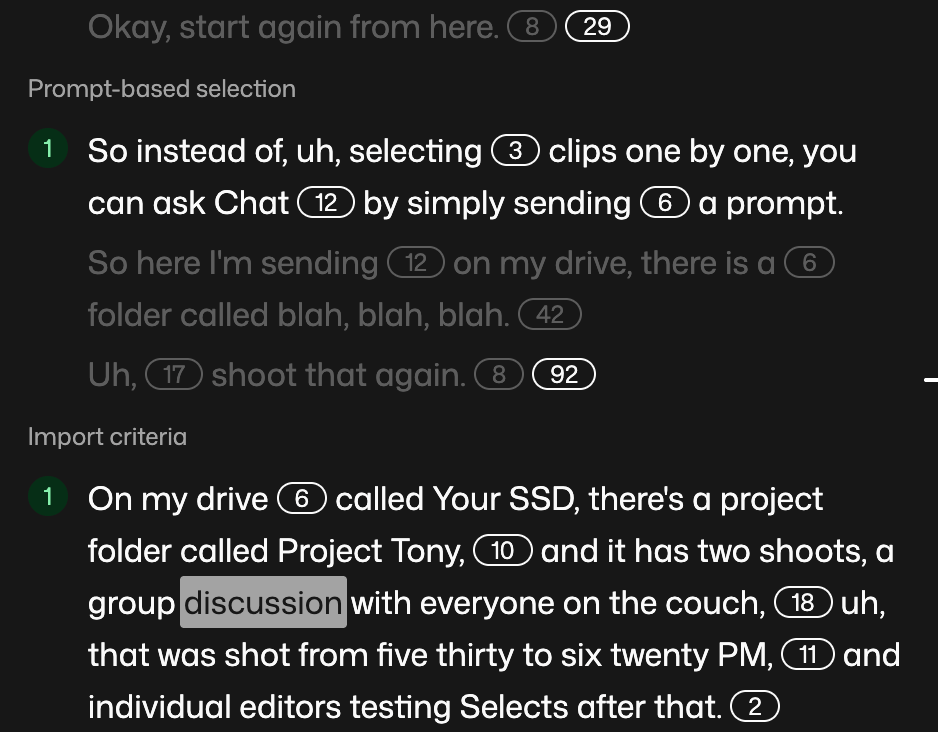
Play the draft back, and ask for a different take wherever the one chat kept sounds flat. For more ways to word requests, see how to edit your video with chat in Selects.
Step 3. Remove silence and cut filler words
Open the Apps tab in the project panel and click Remove silence. Pick a gap between sentences (No gap, Short or Medium), or choose Custom to match the rules above. Set After word ends and Before next word to 0.1 seconds each, and Minimum cut to 0.6 seconds.
Selects only cuts a pause longer than those three settings added together. So pauses under 0.8 seconds stay, and longer ones shrink to 0.1 seconds on each side.
To keep the pauses after jokes and before key points, ask chat instead:
Cut any pause over 0.8 seconds, leaving 3 frames of silence on each side of the cut, but leave the pause after each joke and before each main point.
Cut filler words (also in the Apps tab) takes out hesitations like "um," hedges like "you know" and doubled words, on English footage. On a single camera, choose Minimum jump cuts for a smoother picture. Both tools can put back everything they removed.
Step 4. Add punch-in zooms and B-roll
Zooms are in the Effects app, on its Motion tab. Punch zooms in and holds, Instant snaps in and stays, and Slow push drifts in gently. You can also ask chat to "add a Punch zoom after every other jump cut."
For B-roll, add your extra clips to the project and tell chat where they go:
When I say "dashboard," cut to the screen recording while I keep talking.
That's the L-cut from the hand edit, done for you. Missing a shot? Chat can also generate it (generated media costs credits).
Step 5. Add captions and publish
Open Captions in the Apps tab, click Add captions, and fix any names in the list. Then click the arrow beside Apply to timeline and pick a look, like Keyword yellow.
To post to YouTube, click Export at the top right and choose YouTube under Socials. For LinkedIn or a course platform, export a video file and upload it there.
FAQs
How long should a talking head video be?
Long enough to make one point well. Explainers and lessons often run a few minutes, while a vertical clip for Shorts or Reels is much shorter. Cut any line that doesn't serve the question in your title.
Can I make a talking head video with just a phone?
Yes. Prop the phone at eye level, face a window and add a small clip-on mic. Edit on the phone with an app like CapCut, or move the files to a computer for a fuller edit.
Do I need a script for a talking head video?
No, but an outline of your main points saves editing time. With a full script, Selects matches each line to the take you meant. Without one, it can still group your repeated attempts and keep the best take.
What is the best AI video editor for talking head videos?
It depends on what else you need. We make Selects. It keeps the best take of each line in a solo recording full of retakes, but it doesn't run on phones yet. Descript suits audio-first shows with remote guests, and CapCut suits quick edits on your phone.